Showing posts with label ElfNailPolish. Show all posts

Wednesday, October 11, 2017

Glam Nails Challenge: Oct.11 - Spider Web

Hi guys! Spider Web is the Oct.11 theme for the Glam Nails Challenge. I had a half-moon mani already in mind, and then I saw Martina do a spider mani. She used rhinestones to make the spider's body which I just loved, so I had to add a spider too. Hehe. So I started off with a metallic polish, which left my nails really stained by the way (I had to scrub my nails with a brush and soap, which took most of it off). I found a perfect spider web image, and after adding top coat over the metallic polish, I stamped it on the top of my nails to make a sort of half-moon mani. I then found a good-size spider image and stamped it on. After that, I added the little rhinestones and sealed everything with a top coat. I really like how it ended up looking.
Close-Ups:
So what do you guys think? I really love this mani. It's pretty, simple, and perfect for Halloween. I hope you guys like it.

As always, thank you so much for stopping by. Until next time.
-Ana

Products Used:
Red Metallic: Born Pretty Store item #40788 (B510 Royal Wine)
Silver: Elf Nail Polish "Liquid Metal"
Black Stamping Polish: Born Pretty Store item #18135
Top Coat: Seche Vite
Spider Web Stamping Plate: Born Pretty Store item #35741 (BP-122)
Spider Stamping Plate: Born Pretty Store item #23264 (BP-81)
Medium Clear Jelly Stamper: Born Pretty Store item #26498
Manicure Saver Cotton Claw Tool: Born Pretty Store item #32220
Black Rhinestones: Born Pretty Store item #12412

*Past Press Samples: Born Pretty Store Black Stamping Polish, Spider Web/Spider Stamping Plates, Medium Clear Jelly Stamper, Manicure Saver Cotton Claw Tool, Black Rhinestone Wheel.
*Giveaway Prize: Born Pretty Store Red Metallic Polish.

Thursday, February 23, 2017

Born Pretty Store Review: Glitter Mixes, Stamping Plates & Glass Files

 Press Sample / Giveaway Prize / Gift / Purchased By Me 

Hi guys! Today I have a review of some Born Pretty Store items to share with you. So let's get to it.

First up, we have this Silver Holo Glitter Mix (item #36993, #1). The glitter comes in a small container in a variety of shapes and sizes. The shapes include: stars, moons, hexagons, mickeys, clovers, hearts, diamonds, circles, triangles, butterflies, turtles, and something that looks like dinosaur footprints to me, or maybe they're flowers. Lol. All of the glitters are holo except for the turtles.
I wanted to do a starry sky mani using the glitter mix, so I chose a dark polish with flakies to resemble the night sky. While the polish was still wet, I began placing the glitters. I allowed the polish to dry and then finished with top coat. It ended up looking ok in pictures, but it looked much better in real life.
Close-Ups:
Next up is this gorgeous Gold, Black & White Round Glitter Mix (item #37147, #6). The glitters come in 3 different sizes each. The gold glitters are actually holo, and the black/white glitters are matte. I loved this mix so much, it kind of reminded me of New Year's for some reason. Oh, I must say that when I was working with the glitter I did it over my TwinkledT Glamour Mat. Boy was that a mistake, lol. I accidentally ended up spilling nearly half of the glitter mix onto the mat, and it took me quite a while to get them off. They stuck pretty well to the mat, so I recommend you work over a piece of paper so you can return the extra glitter into the container with ease. To pick up the glitters for both manis, I simply wet the end of my orange stick and was able to pick up and place the glitter without any problems. You might need 2 coats of top coat if you want a smooth surface since the glitters might be a bit bulky. I used 2 coats for both glitter manis.
So for this mani I chose a color I thought would work with the colors of the glitter mix. I think this dark green creme helped the glitters stand out.
Close-Ups:
Okay, now it's time for the stamping plates. The first plate is this Holiday Celebration Rectangular Stamping Plate BPX-L013 (item #38219). It not only has Christmas images, but other images that can be used for New Year's, 4th of July, Spring and even Birthday manis.
I decided to do a colorful Christmas mani. As you can see, I tried to make a decal for my accent nail, and it did come out pretty good but I wasn't able to place it successfully. You can kind of see the wrinkles in there which I didn't like, but that was my fault. I obviously need more practice in making and placing decals. Anyways, I'm really glad I ended up using bright colors because I think the mani ended up looking so cheerful and neat.
Close-Ups:
The second plate was this Christmas Rectangular Stamping Plate BP-L056 (item #37097). This plate mostly has Christmas images, but there was an image on it that looked more galaxy to me, and I knew I had to use it.
I did a gradient with flakie polishes since I thought they'd be best for a beautiful galaxy sky. Once I had that, I went ahead and stamped on the starry image. It came out looking so amazing, I loved it. This plate was my favorite of the 2, it has so many gorgeous Christmas images. Yes, I know the holidays are over, but I still recommend having it in your collection.
Close-Ups:
Extra Mani Shot:
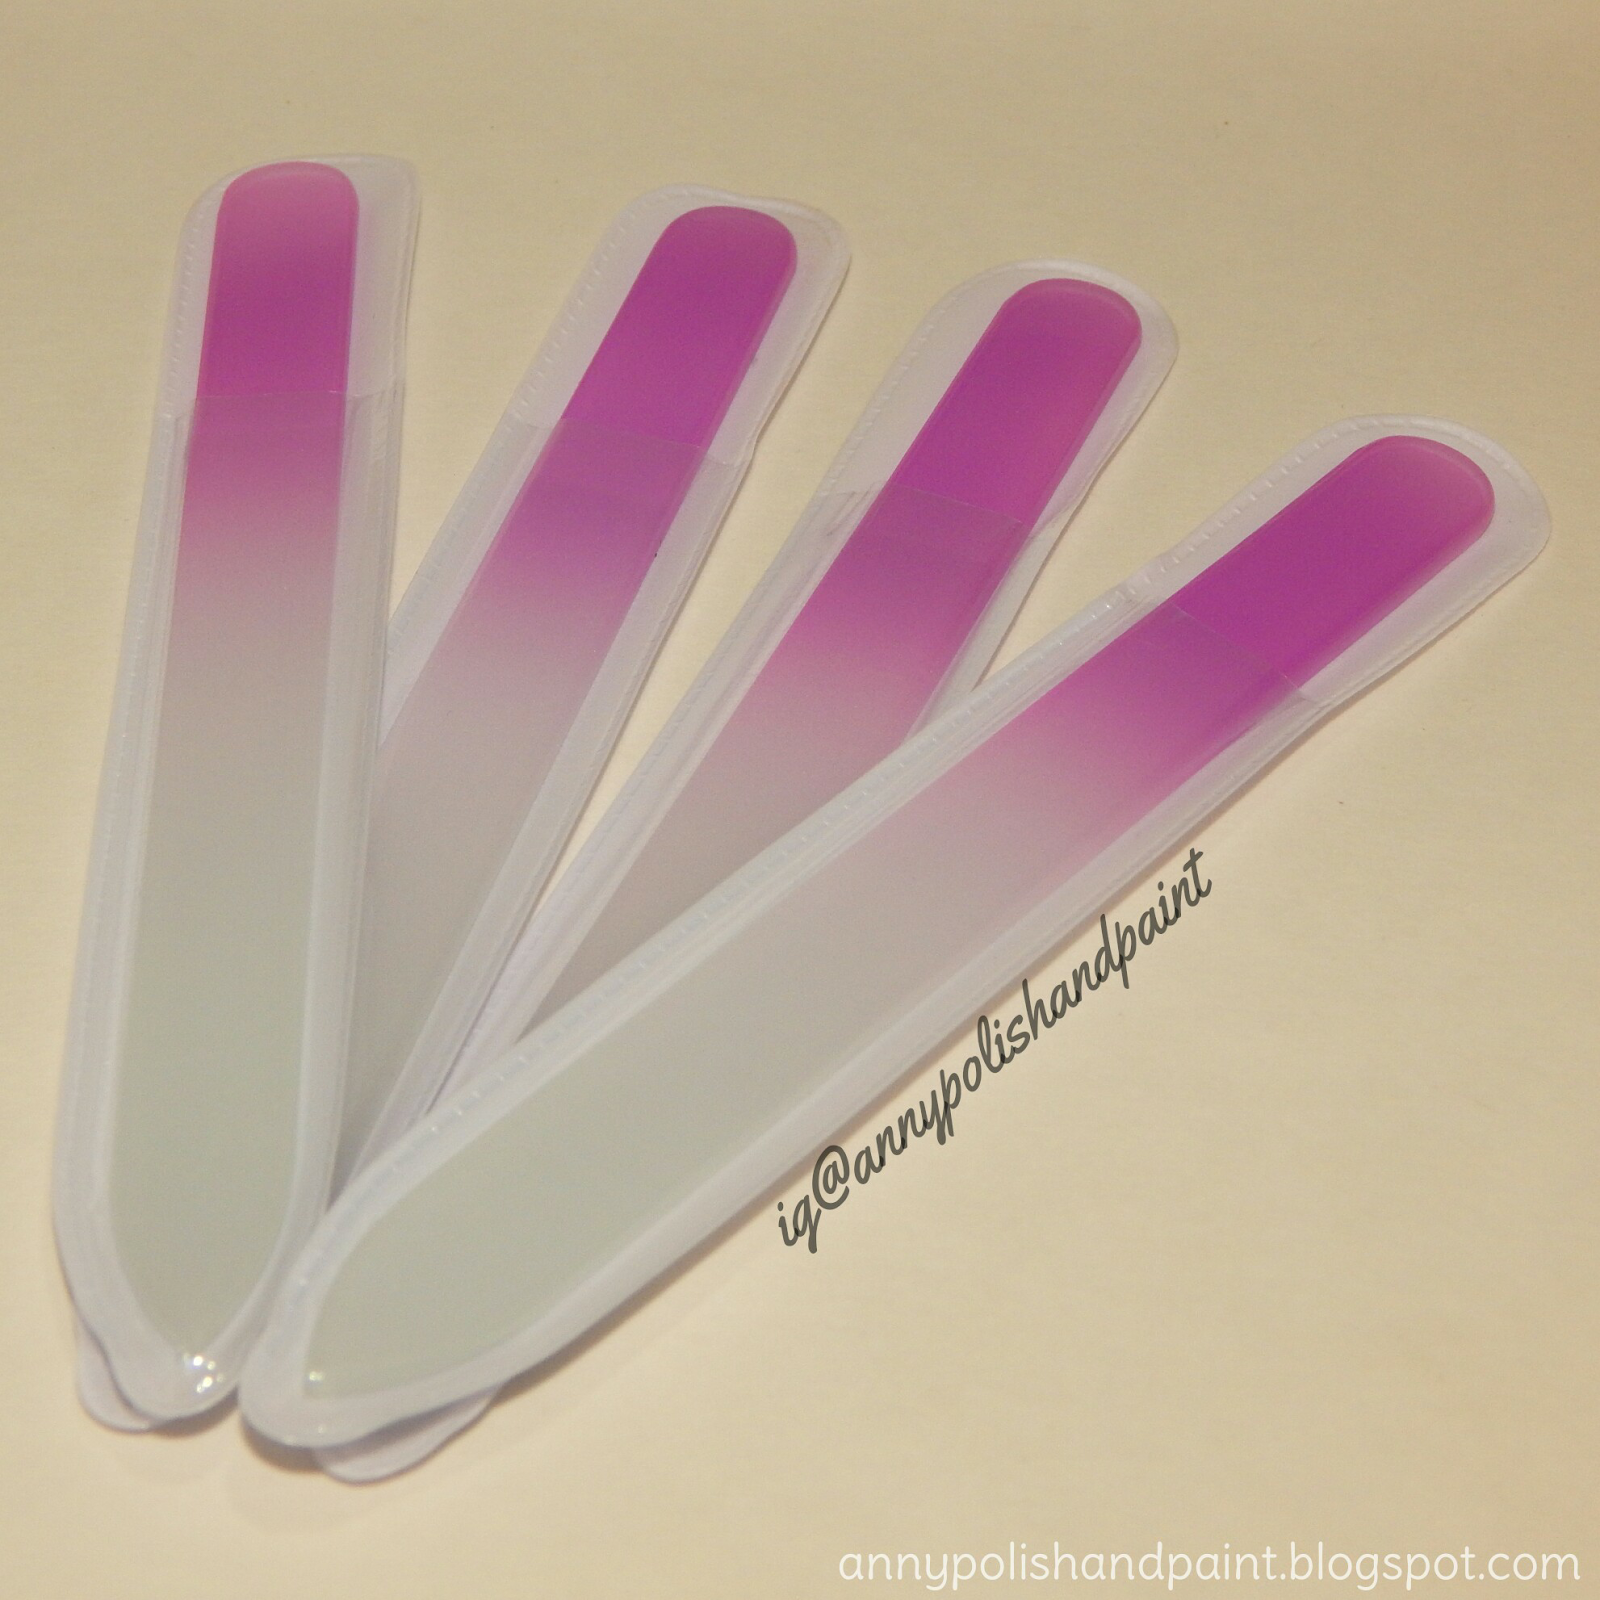
The last items I received were these beautiful Glass Files (item #37588), the listing says it's a pack of 4 files. I actually received 5 by accident, but Cynthia from Born Pretty Store said it was fine. So the files currently don't come in different colors, and that's something I hope they change in the future. That being said, they work great which is the most important thing. I've been using a regular nail file ever since I got into nail art, and when I first heard of glass files I wanted to give them a try. You use them like you would any other nail file, but they are definitely much more gentle on your nails. I did feel like it took me a bit longer than usual to file my nails, and it felt a bit odd, but it didn't feel as harsh on my nails as it usually does. I was very impressed. Also, if you've ever filed your nails, then you've most likely seen that some nail residue (I guess you can call it that) is left behind after you file your nails. I noticed when using the glass file that not much residue was left over.
This picture is after using the glass file. Although I feel like I will have to get used to using the glass file, I did love how gentle it was on my nails.
Overall, I was very pleased with all the items, especially the glass files. I recommend you give them a try.

I hope you guys liked the manis and review. Remember that you can get 10% off any regular priced items from Born Pretty Store by using my code ANNYW10.

As always, thank you for stopping by. Until next time.
-Ana

Products Used:
Black Creme Polish: Serendipity Nail Polish "Building My Empire"
Black Flakie Polish: Covergirl "Diva After Dark"
Green Creme Polish: Serendipity Nail Polish "Cash Flow Queen"
Sheer Nude Polish: Wet N Wild "2% Milk"
Yellow Creme Polish: Covergirl "#GetGlowing"
Pink Creme Polish: Fantasy Makers "Ghouls Rush In"
Green Jelly Polish: Fantasy Makers "Queen of Envy"
Red Creme Polish: Fantasy Makers "Bloody Marie"
Blue Creme Polish: Elf Nail Polish "Skinny Jeans"
Gold Polish: Elf Nail Polish "Pot of Gold"
Silver Polish: Elf Nail Polish "Liquid Metal"
Fuchsia Flakie Polish: Glam Polish "Go Eat Worms!"
Red Flakie Polish: Glam Polish "Vampire Breath"
Blue Flakie Polish: Glam Polish "Night of the Living Dummy"
Dark Teal Flakie Polish: Glam Polish "Werewolf of Fever Swamp"
Green Flakie Polish: Glam Polish "Revenge of the Lawn Gnomes"
Black Stamping Polish: Born Pretty Store item #18135
White Stamping Polish: Born Pretty Store item #18136
Clear Jelly Stamper: Born Pretty Store item #26498
Top Coats: LACC Beauty "2013 Top Coat" & Serendipity Nail Polish "Finishing Touch"

*Glitter Mixes, Stamping Plates and Glass Files I reviewed in this post were Press Samples. Serendipity Polish "Building My Empire", "Cash Flow Queen", "Finishing Touch"; LACC Beauty "2013 Top Coat"; and Glam Polish "Go Eat Worms!", "Vampire Breath", "Night of the Living Dummy", "Werewolf of Fever Swamp", "Revenge of the Lawn Gnomes" were giveaway prizes. Elf Nail Polish "Skinny Jeans", "Pot if Gold", "Liquid Metal" were a gift. Born Pretty Store Black/White Stamping Polishes and Clear Jelly Stamper were past Press Samples.

Sunday, March 6, 2016

The Polished Bookworms: February 2016

 Purchased By Me / Gift / Giveaway Prize / Press Sample 

Hi guys, I'm back with a TPB post. I actually finished the book this time, so hooray! Lol. Anyways, we read Pretty Girls by Karin Slaughter. I have to say that it was kind of difficult to get through the book because it was pretty violent and graphic. That being the case, I decided to base my mani off the book cover.
I started off with a white base, then followed with a gradient which was done with acrylic paints. I added a layer of top coat over the gradient so I could stamp on my nails. The bubbles and water wave images came from 2 different Bundle Monster plates from their Sun Kissed Collection. I stamped on the water waves with a blue polish first, but it blended into my gradient so I used white so they'd stand out. To make the necklace on my ring finger I picked up an image from a Born Pretty Store plate and took parts of the image away with some tape, then I put top coat over the image on the stamper to create a decal. The heart locket took me a while to make, I took some heart studs and "glued" them together by putting a strip of tea bag to connect them, and sealing it in with top coat. Afterwards, I just painted it with the gold polish and added a final layer of top coat to protect the charm.
I'm so happy with how the mani turned out, especially since I created the little charm myself. It definitely looked much better in real life, but I still hope you liked it.
Close-Up:
Locket Close-Up:
Well thank you so much for stopping by, until next time.
-Ana

Products Used:
White: Sinful Colors "Snow Me White"
Gold: Elf Nail Polish "Pot of Gold"
Blue: Lavish Polish "Hydrangeas"
Top Coat: Love, Angeline "Topped With Love"
Bubbles Plate: Bundle Monster BM-505
Waves Plate: Bundle Monster BM-509
Necklace Chain Plate: Born Pretty Store item: #17267
Heart Studs: Born Pretty Store item: #7277

*Lavish Polish "Hydrangeas" and Bundle Monster plates were giveaway prizes; Love, Angeline "Topped With Love" was a Press Sample.

Monday, February 1, 2016

The Polished Bookworms: December 2015

 Purchased By Me / Gift / Press Sample 

Happy Monday guys, I hope you all had a wonderful weekend. Today I have a TPB mani for December's book, Outlander by Diana Gabaldon. I was unable to read this book so I decided to base my mani on the colors of the book cover instead. I was also inspired by @polishandbeyond on Instagram. She did a beautiful mani that I just had to recreate, but of course, I used different colors to match the book cover. Let's take a look.
I used a dark blue on my index and pinky, gold on my ring finger, and white on my middle finger. Since I was going to add dots, I top coated the white and blue nails so the colors wouldn't run or mix. I used a dotting tool to do the blue dots, and a toothpick to add the gold dots. It worked out perfectly. I let that dry completely, and then added my final top coat. I love how it turned out, it's a simple but beautiful look.
Close-Ups:
With the Book:
Well I hope you guys liked this mani. By the way, we already have the TPB book line up for February-June 2016. You can still join the group if you'd like, the links are below.

The Polished Bookworms: Instagram - Facebook Group - Facebook Page

Like always, thanks for stopping by and until next time.
-Ana

Polishes Used:
White: Sinful Colors "Snow Me White"
Blue: Elf Nail Polish "Skinny Jeans"
Gold: Elf Nail Polish "Pot of Gold"
Top Coat: Love, Angeline "Topped With Love"

*Love, Angeline "Topped With Love" was a Press Sample.

Friday, November 20, 2015

A Weekly Dose of Rainbows: Rainbow Fashion

 Purchased By Me / Gift / Giveaway Prize 

Hey guys, I hope you're all doing well. This week's A Weekly Dose of Rainbows theme was Rainbow Fashion, and I had absolutely no idea what I'd be doing. I looked up fashion images on Google and found no inspiration I liked. Then I remembered how much I love the fashion from the show Reign, which is one of my favorite shows. I looked up pictures and there were so many beautiful looks that it was difficult to choose just one. Anyways, I chose a gorgeous gown Adelaide Kane (who plays Mary Queen of Scots) wore for some promotional pictures of the show as inspiration.
Picture from Google:
I started off with gold polish on all my nails as my base color. On my pinky and ring finger I added a nail art water decal from the Born Pretty Store, but I painted half of my pinky with black polish and added some round gold nail studs down the middle. On my index and middle finger I applied some TwinkledT mermaid scale vinyls, after applying top coat of course, and then sponged on some brown polish. I let that dry and added top coat. Afterwards, I put a single chevron vinyl on my index finger and painted the top black. To finish the mani, I added some gold acrylic paint dots in the middle of the scales just like on the dress. My pinky and ring finger represent the skirt of the dress, and my middle and index finger represent the top of the dress.
Glossy:
Matte:
I also had to add matte top coat because I thought it'd look nice.
Glossy:
Matte:
Remember you can use my code ANNYW10 for 10% off your Born Pretty Store purchase if you'd like.
Glossy Close-Ups:
Matte Close-Ups:
Well I hope you all liked this mani. Thank you for stopping by, and until next time everyone.
-Ana

Products Used:
Gold: Elf Nail Polish "Pot of Gold"
Brown: New York and Company "Saturn Sunset"
Black: Wet N Wild "Black Creme"
Glossy Top Coat: Glisten & Glow "HK Girl Glossy Top Coat"
Matte Top Coat: Wet N Wild "Matte Top Coat"
Nail Art Water Decals: Born Pretty Store item ID #20699
Nail Studs: Born Pretty Store item ID #7277
Mermaid Scale Vinyls: Twinkled T
Single Chevron Vinyls: Not known

*New York and Company "Saturn Sunset", Glisten & Glow "HK Girl", Twinkled T mermaid scale vinyls and single chevron vinyls were giveaway prizes

Tuesday, November 17, 2015

The Polished Bookworms: October 2015

 Purchased By Me / Gift / Giveaway Prize 

Hey guys, sorry for the huge delay with this post. I have not finished October's book just yet, but decided to do a mani anyways. I was really enjoying it, but got kind of busy and I stopped reading. October's read was All the Light We Cannot See by Anthony Doerr. I took inspiration from the jewel that was talked about, the Sea of Flames, it was described as a beautiful blue stone with a hint of red at its center.
I started off with a white base to make the colors pop, and did a circular gradient with blue and red polishes over that. Once I was done with the gradient, I sponged on a red glitter jelly polish over the red, and a blue glitter jelly polish over some of the blue. I'm so happy that I did because it ended up looking so much more beautiful. It also gives it more depth. Last thing to do was top coat of course. I love how this came out, and I hope it was worth the wait guys.
Close-Ups:
With the Book:
Thank you for stopping by, and until next time.
-Ana

Polishes Used:
Sinful Colors "Snow Me White"
Sinful Colors "Keira Blu"
Elf Nail Polish "Skinny Jeans"
Elf Nail Polish "Smokin Hot"
Stardust Polish "Angry Angel"
Stardust Polish "Kinda Jazzy"
Glisten & Glow "HK Girl Glossy Top Coat"

*Glisten & Glow "HK Girl" and Stardust Polish "Kinda Jazzy" were giveaway prizes

Wednesday, September 16, 2015

Pretty in Purple & Silver

 Purchased By Me / Gift / Giveaway Prize* 

Hi guys! Today's nail art is full of purples and silver, oh and a bit of holo glitter of course. Hehe.
Well I sat down to do some nail art, but had no real plan or vision of what I was going to do. I pretty much just picked some polishes I thought would look good together, including Sinful Colors Berry Charm which I've been wanting to use, and started to work.
Close-Ups:
I started with a coat of my diy peel off base coat, and then I added my base colors. Berry Charm is so pretty, but I had to be careful with it because it did flood my cuticle a bit. I top coated and waited a good 15-20 minutes before applying my diamonds vinyl, which are from Twinkled T. Once I put my vinyl down, I sponged on a diagonal gradient using Elf Nail Polish W2 and Liquid Metal. On my ring finger I did a glitter gradient with OPI Desperately Seeking Sequins which is super sparkly, over Berry Charm. I kept it simple on my pinky and index finger. Liquid Metal is on my pinky, and W2 on my index with a silver stud from the decoration wheel (item ID #7277) I purchased from the Born Pretty Store. Remember, you can use my code ANNYW10 for 10% off your purchase. All that was left to do was finish with top coat.
Holding OPI "Desperately Seeking Sequins":
I'm really satisfied with the outcome, I think it looks nice.

Well I really hope you liked this design. If you decide to recreate it don't forget to use my hashtag annypolishandpaint on Instagram so I can see, you can also tag me if you'd like. Thank you for stopping by, and until next time.
-Ana

Polishes Used:
Purple Creme: Sinful Colors "Berry Charm"
Purple Shimmer: Elf Nail Polish "W2"
Silver: Elf Nail Polish "Liquid Metal"
Glitter Topper: OPI "Desperately Seeking Sequins"
Top Coat: Glisten & Glow "HK Girl Glossy Top Coat"

*Twinkled T vinyls and OPI Desperately Seeking Sequins were a giveaway prize

Tuesday, August 11, 2015

Pretty Little Liars Nail Art

 Purchased By Me / Gift / Giveaway Prize* 

Happy Tuesday everyone! I don't usually do manis when I watch shows, but I wanted to do one for this episode. If you watch Pretty Little Liars, then you know that we'll soon be finding out who A is. I'm so excited, but nervous to finally get some answers. My sister and I have been trying to come up with a theory on who Charles might be, but we haven't settled on anything solid, so we have no clue. We'll just have to wait for the episode and see what happens.

I was loosely inspired by one of Roselynn's (roselynn787 on Instagram) PLL manis which you can see on her blog, just click here.
Holding Wet N Wild (Fergie) "Make Them Boys Go Loco":
I decided to do a glitter accent on my ring finger over a black base, I used 2 different glitter toppers that have red and black/silver/charcoal glitters. On my index and pinky I did a white base, put a coat of top coat, and then used 2 red polishes to do a "blood spatter". The red polishes look pretty similar, but the elf nail polish was a bit darker. Lastly, I did a black base on my middle finger and added a coat of top coat because I decided to do the "A" with acrylic paint. I sketched out the "A" with white paint first, and then painted over that with red so it would pop. I finished the mani by sealing it all in with a glossy top coat.
I hate how the "blood spatter" on my pinky came out, but other than that, the mani looks ok. So will you be watching tonight? I'm hoping I'll be able to watch it live because I don't want to come across any spoilers. By the way, please try not to leave any spoilers in the comments just in case there are other people who haven't watched it yet.
Close-Up:
Thanks so very much for stopping by, I hope you enjoyed this post. Until next time everyone.
-Ana

Polishes Used:
White: Sinful Colors "Snow Me White"
Black: Wet N Wild "Black Creme"
Red: Bonita Colors "Forever And A Day"
Darker Red: Elf Nail Polish "Smokin Hot"
Black/Silver Glitter: Wet N Wild (Fergie) "Black Metal Magic"*
Red Glitter: Wet N Wild (Fergie) "Make Them Boys Go Loco"*
Top Coat: Glisten & Glow "HK Girl Top Coat"*

Wednesday, August 5, 2015

Guest Post At Nails Like Lace

Hi guys, I hope you're all doing well. Today I have a guest post for Amber over at Nails Like Lace. Amber always does such fun nail designs, and she's super nice. You should give her a follow if you don't yet, you won't be disappointed. Oh, and while visiting her page, you can check out the other guest posts.

So, here's the nail art I did for my guest post. Head on over to her blog to read more about it and see more pictures. Just click here, and it'll take you directly to the blog post.
Thanks for stopping by.
-Ana

Saturday, July 4, 2015

4th of July Nail Art

(Purchased By Me, Gift, Giveaway Prize)

Happy Fourth of July! If you guys are celebrating, then I hope you have a fun and safe holiday. To those who aren't, may you have a wonderful weekend as well.

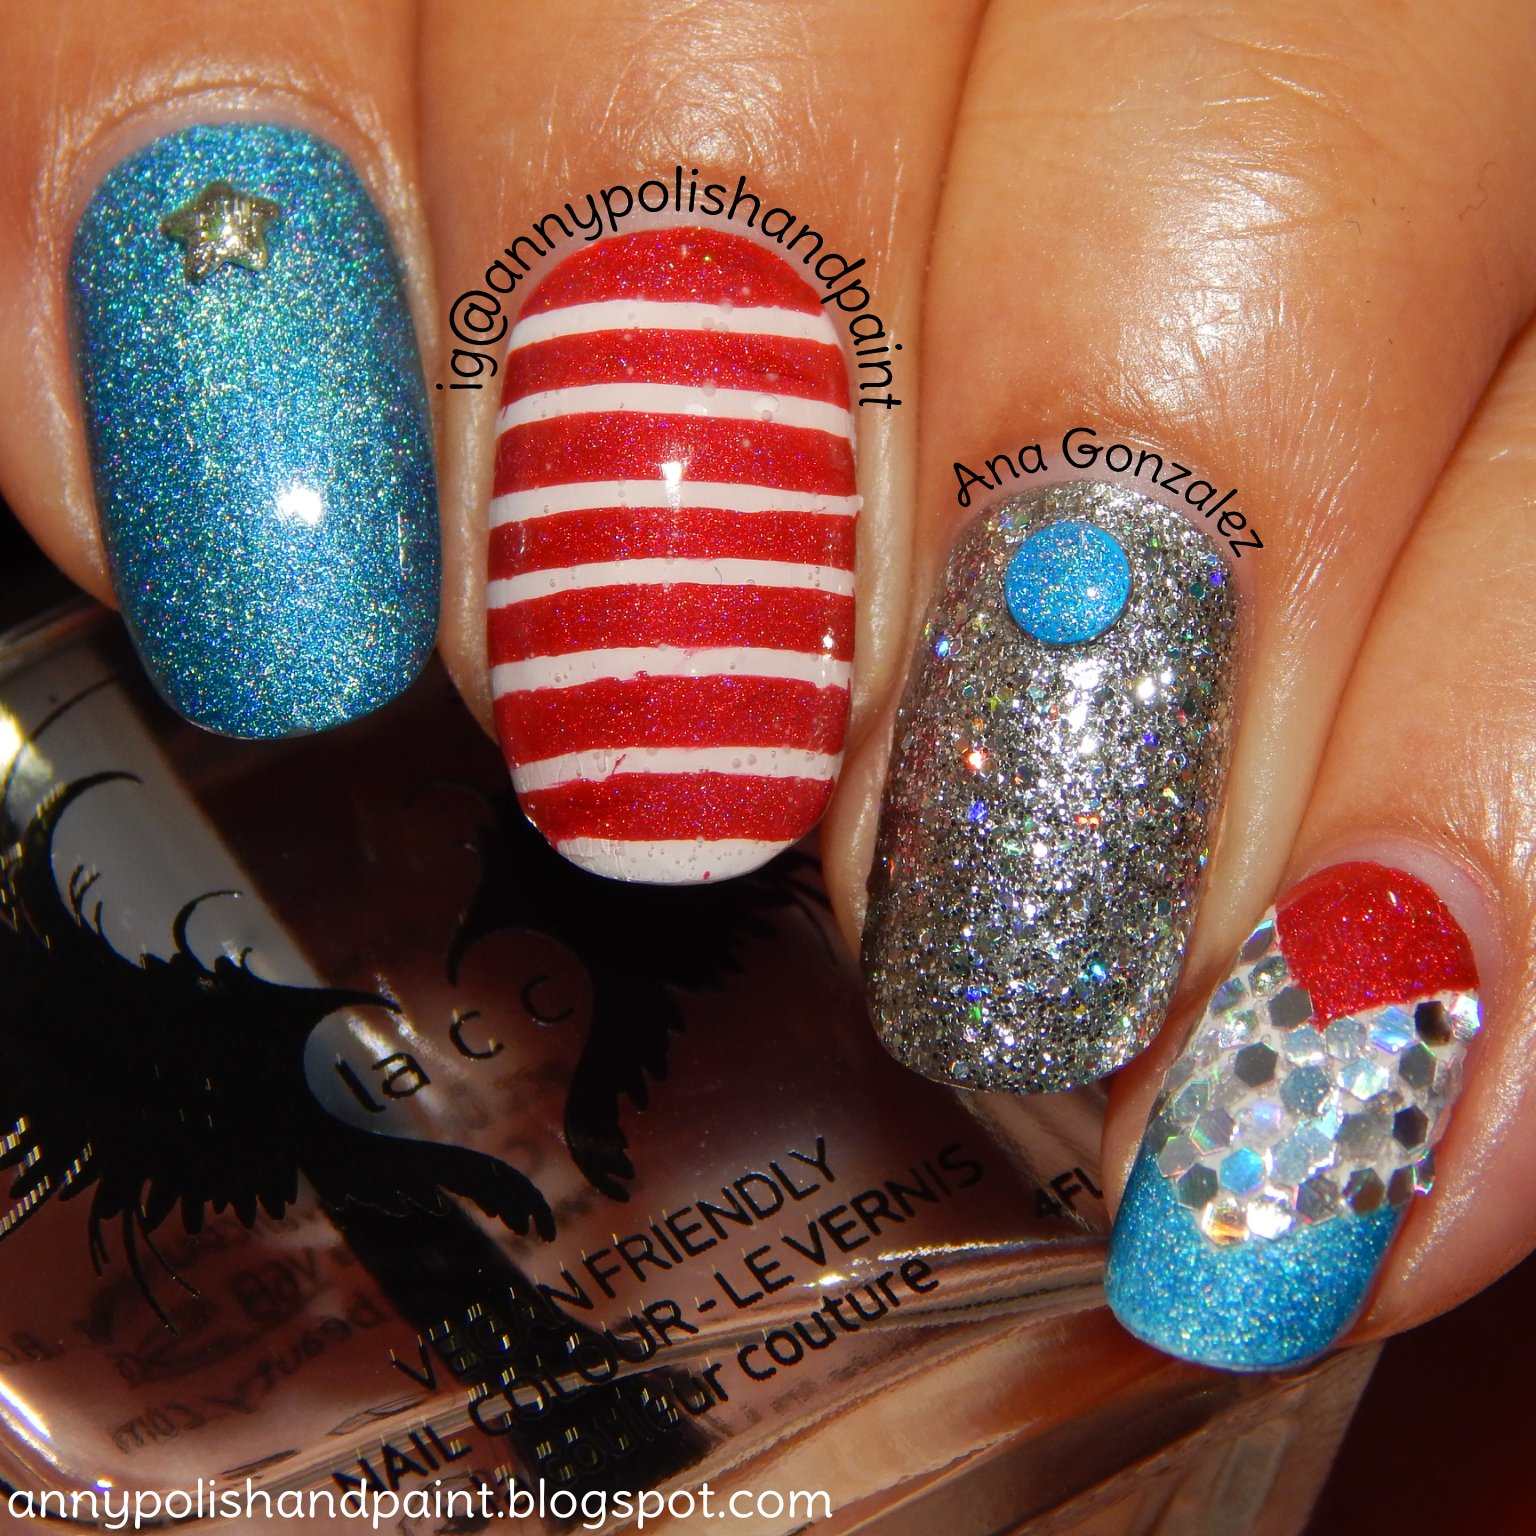
I usually forget to do holiday manis, but this time I did 2 just for fun. The first one is a holo 4th of July mani with studs and some glitter placement, the second one is an incredibly sparkly striping tape mani with silver glitter stars. I've listed all the polishes I used at the end of the post like I usually do.

For the first mani, I chose a blue holo (Aria) for my index finger. On my middle and pinky I did a white base (Snow Me White), and on my ring finger I put on a silver base (Liquid Metal). I put on some top coat on my middle and pinky so I could lay down the striping tape, and then added the according polish on top. For the pinky, I did 2 "V" shapes with the striping tape, and filled in the top and bottom with red and blue. It was supposed to be white in the middle, but the red smeared, so I decided to add the glitter. I also added a silver holo glitter (Spice It Up) over the silver base on my ring finger to add some sparkle. The studs I added were originally neon colored, but I used the silver polish to paint the star stud, and the light blue holo to paint the circle stud.
Holding LACC Beauty "2013 Top Coat":
Close-Ups of Index/Ring Finger:
For my second mani, I decided I'd do something more flashy and sparkly. Who needs fireworks when you've got glitter, right? Oh, and not just any glitter but holo glitter. Hehe. Well, I used a blue jelly polish (Kinda Jazzy) on my index finger, and a red jelly polish (Angry Angel) on my middle and pinky. On my ring finger, I put down some striping tape and painted on the blue. Then I just added the red underneath very carefully, trying not to get it on the blue. When that all dried I added some top coat on all the nails on which I'd be using striping tape, and then proceeded to place it when dry. When I had all the striping tape placed on my nails, I sponged on the silver holo glitter (Spice It Up) on top. To finish off I placed the silver stars on the blue parts of my nails to complete the flag look, and I added top coat. I love how this mani turned out. It's so sparkly, and I like the texture it has.
Holding Stardust Polish "Angry Angel":
Close-Ups:
Well I hope you liked these 2 different 4th of July designs. If you have any questions, please leave them below. Also if you recreate these, make sure to tag me on Instagram, and use the hashtag #annypolishandpaint so I can see it. Thank you for stopping by, and may you all have a great weekend. Until next time guys.
-Ana

Polishes Used:
First Mani:
Blue Holo: Daily Hues Nail Lacquer "Aria"
Red Holo: Daily Hues Nail Lacquer "Carol"
White: Sinful Colors "Snow Me White"
Silver: Elf Nail Polish "Liquid Metal"
Silver Glitter: Bonita Colors "Spice It Up"
Top Coat: LACC Beauty "2013 Top Coat"

Second Mani:
Blue: Stardust Polish "Kinda Jazzy" 
Red: Stardust Polish "Angry Angel"
Silver Glitter: Bonita Colors "Spice It Up"
Top Coat: LACC Beauty "2013 Top Coat"