Showing posts with label LACC. Show all posts

Friday, May 1, 2015

The Polished Bookworms: April 2015

Hey guys, it's time for another TPB mani. This month's read was The Hitchhiker's Guide to the Galaxy by Douglas Adams. Confession time: I didn't read the book this month. *Gasp!* I only read a chapter or so, and never finished it. But, I didn't want to completely fail so I went ahead and did a mani inspired by the book cover. Lol. Therefore, I must ask you guys not to spoil it for me. Well anyways, this doesn't mean I won't be reading it. It'll be a challenge but I'm going to try to read April's and May's book choices this coming month. I don't want to miss out on any of the books, even if I have to read them all late. So, since I have no idea what the book is about, I used the book cover as inspiration for my mani. I like how they turned out, especially because they're galaxy nails.
For this mani, I first put on my trusty diy glue peel off base coat. I then did a coat of Wet N Wild "Bijou Blue", I waited until it dried and then added blobs of different shades of blue on my nail. I cut up some pieces from a plastic baggy to place over the blobs of polish and pressed down so they could blend together. I'm not sure what the technique is called, but Claire from @practise_makes_perfect on Instagram recently posted about it, and she called it the saran wrap technique. So I did that and once blended, I removed the plastic and it left a pretty cool blend of blues. I let that dry and sponged on white across all my nails, and sponged on WNW "Bijou Blue" and Black Label Nails "Frosty's Mistress" over so it wouldn't be too white. After that, I added a coat of WNW "Kaleidoscope" for the sparkly stars. The acrylic paints came next, I used a toothbrush and the white paint to splatter on some stars, and also added some with a toothpick. Then, I began to paint the little planets. First with white so the colors would pop more, and once I had the shape painted on, I added the colors. I let it all dry and added top coat.
With the Book:
I loved how the galaxy mani came out on its own, check it out, here it is without the planets and stars.
Anyways, I hope you enjoyed this post. If you'd like to follow and join our Book Club, I have the links below.

The Polished Bookworms: Instagram, Facebook Group, Facebook Page

Thanks for stopping by, and stay tuned for next month's book: The Bell Jar by Sylvia Plath. Until next time.
-Ana

Polishes Used:
Wet N Wild (Wild Shine) "Blue Moon"
Wet N Wild (Wild Shine) "Bijou Blue"
Frankenpolish I made with different polishes I named "Elsa"
Wet N Wild (Wild Shine) "French White Creme"
Wet N Wild (Wild Shine) "Kaleidoscope"
Black Label Nails "Frosty's Mistress"
Wet N Wild (Wild Shine) "Matte Top Coat"
LACC "2013 Top Coat"

Acrylic Paints Used:
Apple Barrel White
Apple Barrel Lime Tree
Craftsmart Grey
Craftsmart Holiday Red
Craftsmart Pool Blue
Craftsmart Plum

Monday, April 13, 2015

Lavish Polish Spring Collection 2015

Hi guys, I hope you all enjoyed your weekend. I received my giveaway prize from Lavish Polish a while back and I've been wanting to swatch these for you guys. I'm glad to finally be able to show them to you, they're lovely.
So, not only do the bottles have the name of the polish on the bottom label, but they also include the collection they're from. I really liked that, I thought it was a pretty cool because I'll always know which collection they're from.
The formula on these were similar. They do take some time to dry, and you should be careful not to overload the brush or you'll get flooding at the cuticle. The polish itself was very creamy and went on smoothly. I must also mention that they are sheer on the first coat because they're crellies, but you can totally build them up depending on the look you're going for.

First up we have Hydrangeas, a gorgeous blue crelly. This was my favorite of the collection, it's just a beautiful blue. I did 3 coats to reach full opacity, 2 would've been fine but I still had a visible nail line (vnl). Again, you can do however many coats you'd like, I just prefer to see them opaque.
3 coats plus top coat, and matte top coat on the ring finger are shown in the pictures:
Tulips is a pretty purple crelly. I did 3 coats to reach full opacity.
3 coats plus top coat, and matte top coat on the ring finger are shown in the pictures:
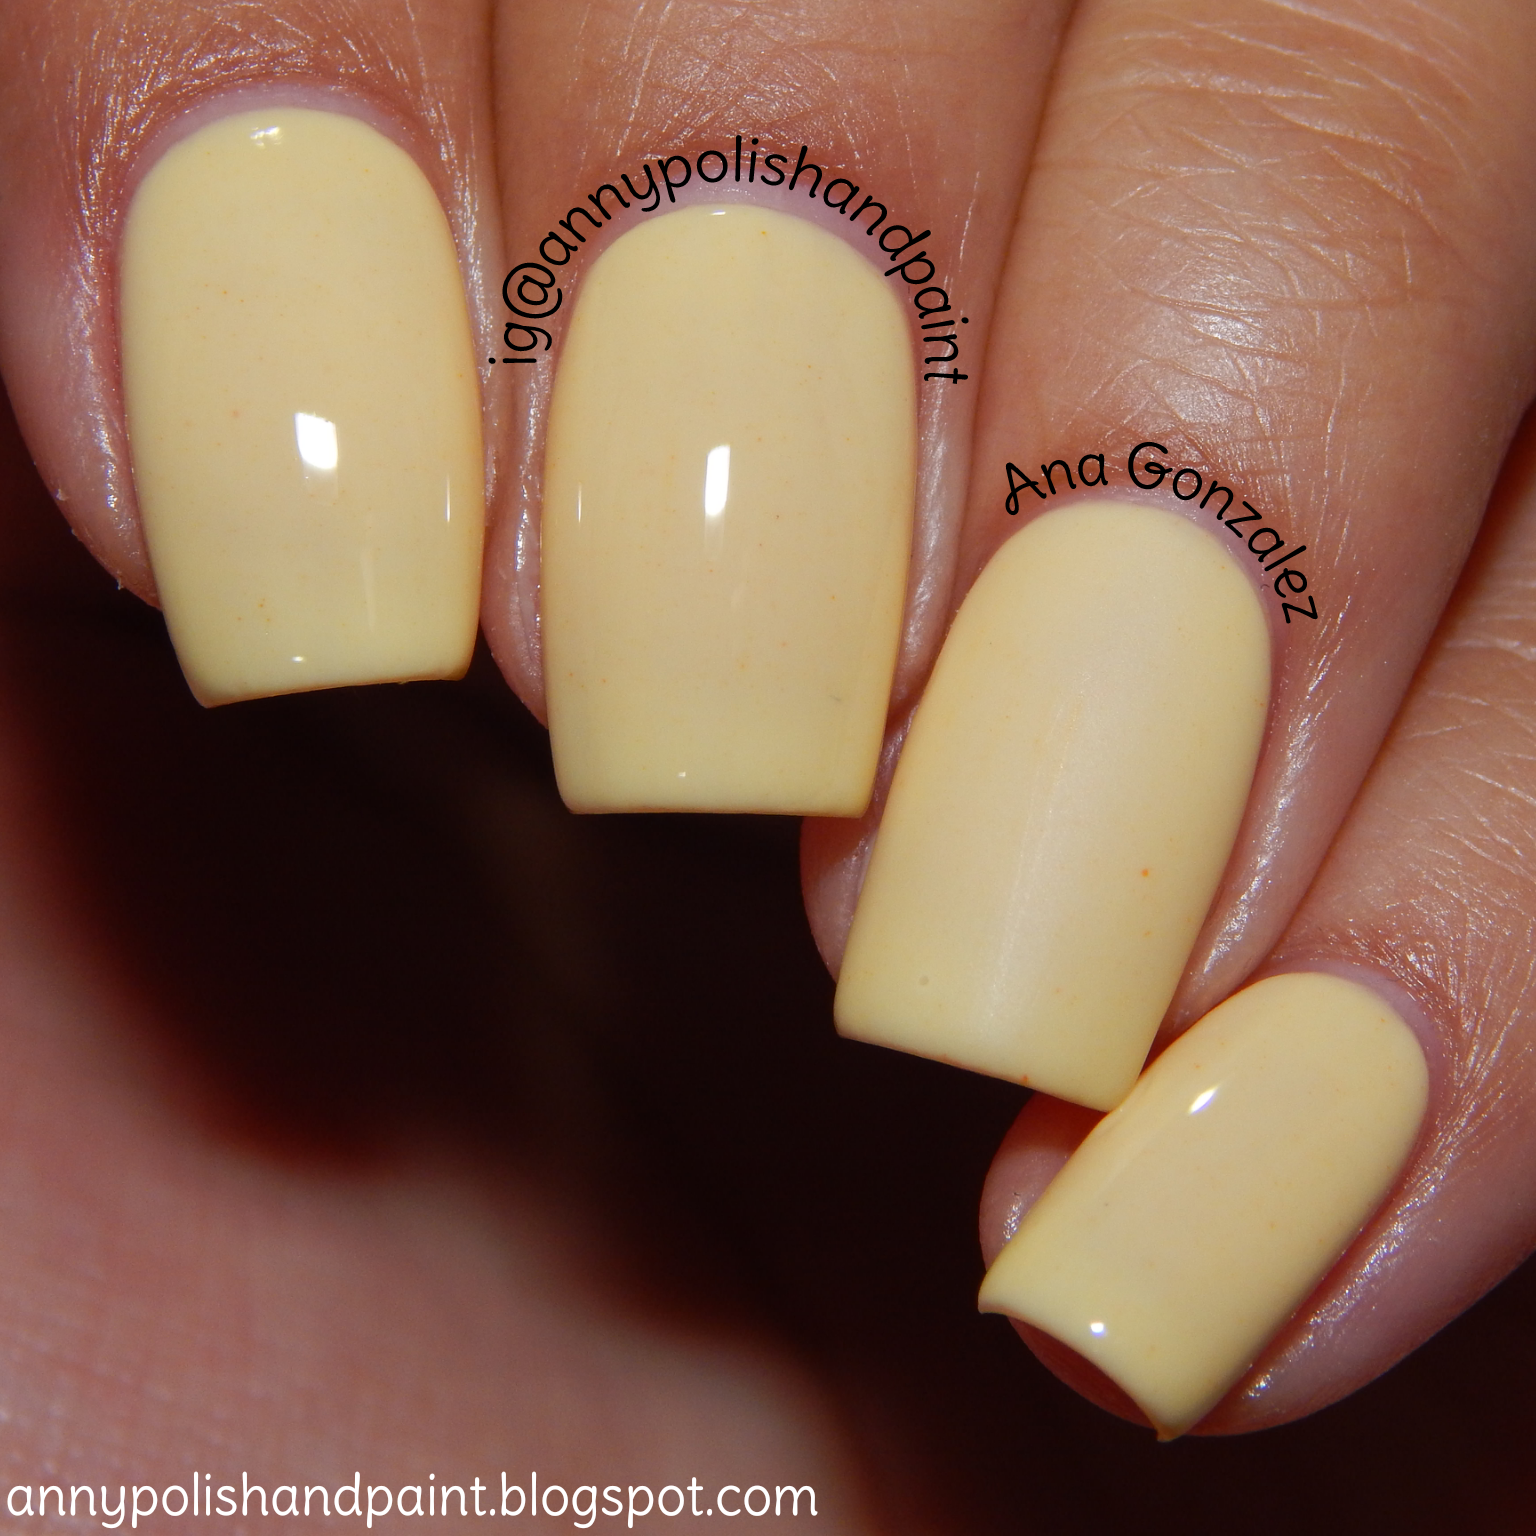
Daffodils is a pastel light yellow crelly. It was sheer on the first 2 coats, so I think I'll use a white base next time I use it. I needed 4 coats to reach opacity with this one.
4 coats plus top coat, and matte top coat on the ring finger are shown in the pictures:
Azaleas is a soft, very delicate light pink crelly. I did 3 coats to get it opaque.
3 coats plus top coat, and matte top coat on the ring finger are shown in the pictures:
Wisteria is a delicate lavender crelly, perfect for Spring time in my opinion. I did 3 coats for opacity.
3 coats plus top coat, and matte top coat on the ring finger are shown in the pictures:
Aren't they pretty? I really liked the shades in the collection, very soft and delicate pastel colors. Although I do think a pastel green color would have been a nice addition as well. Also, I normally I don't like purple, but both shades in the collection were beautiful. Wisteria kept reminding me of Fantasy from "The Pagemaster". Hehe! It's a movie I watched as a child, if you haven't watched it I recommend it.

So what do you guys think of the collection? Which polish is your favorite? Mine has got to be Hydrangeas, followed closely by Wisteria and Tulips. If you'd like to follow Emely from Lavish Polish to keep up to date with releases and collections, I have her links below.

Lavish Polish: Shop, Instagram, Facebook, Twitter

Well I hope you guys enjoyed this post and the swatches. Until next time guys.
-Ana

Top Coats Used:
Top Coat: LACC "2013 Top Coat"
Matte Top Coat: Wet N Wild (Wild Shine) "Matte Top Coat"

Sunday, April 5, 2015

Happy Easter!

Happy Easter to those of you that celebrate. I hope you are all enjoying this beautiful Sunday with your family and loved ones. So I have some Easter nail art for you guys today. I chose 2 pretty Stardust polishes for my mani; a blue holo named "Stephany" (which I reviewed here), and a white crelly with aqua/pink glitters called "Sweet Spring" (which I reviewed here). I'll have Drema's links below if you'd like to follow her for Stardust Polish updates, or if you'd like to purchase from her.
For the nail art I did a bunny inspired by nailsbyic on Instagram. I also did some flowers, since I was already using a nail dotter. To finish off the flowers, I added some individual pink glitters in the middle. Lastly, I sealed everything in with top coat. They actually came out pretty cute, so that was nice.
Well I hope you enjoyed this short post, until next time guys.
-Ana

Stardust Polish: Etsy, Instagram, Facebook Page

Polishes Used:
White Crelly: Stardust Polish "Sweet Spring"
Blue Holo: Stardust Polish "Stephany"
Top Coat: LACC "2013 Top Coat"

Friday, April 3, 2015

The Polished Bookworms: March 2015

Hey everyone, I finally had the chance to do my TPB post. The book that was picked for March was Gone Girl by Gillian Flynn. It was on my to read list after I heard about the movie actually. I didn't know it was a book, and when I heard the movie was good, I knew I had to read it before watching the movie. The book was pretty good, even though the ending was completely different than I thought it'd be. But it went perfectly with the story when you think about it. The day after I finished the book, I watched the movie and really enjoyed it. I thought they did a decent job and didn't change it a whole lot. I ended up picking a part of the book that shocked me. SPOILER ALERT!!! Look away now if you don't want to know: I was shocked when Amy murdered Desi. I couldn't believe she actually got to the point of killing someone. The whole making up stories and framing Nick was different, they were lies. I know they weren't little lies, but from lying to killing? That surprised me.
So, on my pinky I painted the twine Amy used to do the ligatures on her wrists and ankles. To be honest, it looks pretty weird to me, lol. On my ring finger is the bloody knife she used on Desi, and my index and middle finger have blood spatter. The knife and twine were done with acrylic paint. I used KleanColor "Blood" to do the blood splatter. This mani isn't really my favorite, but yeah.
With the book:
I hope you guys liked the post, and if you have a chance to read this book, I totally recommend it. Stay tuned for April's TPB post. We're reading The Hitchhiker's Guide to the Galaxy by Douglas Adams next. If you'd like to join The Polished Bookworms, you can click on the links below:

Facebook Group, Facebook Page, Instagram

Well thank you for stopping by guys, until next time.
-Ana

Polishes Used:
White: LACC "No. 2005"
Red: KleanColor "Blood"
Top Coat: LACC "2013 Top Coat"

Tuesday, March 31, 2015

Bestie Twin Nails with Amanda

Happy Tuesday guys. Can you believe that we're a fourth of the way into the year? That's just crazy. Anyways, tomorrow is the beginning of April, and April is Amanda's (sparklicious_nails on Instagram) birthday month. So to celebrate, Amanda decided to do various Bestie Twin Nail collabs, and I was lucky enough to be one of those she picked. If you guys don't follow her already, you should check out her page. She's very talented. Amanda asked those interested in doing a BTN with her, to send an inspiration. I sent her a picture of a mani done by Cho, who is extremely talented as well, she's better known as chorubim on Instagram. It's a mani I've wanted to recreate for a long time, and it seemed like a very fun and pretty mani to do. You can see it here. Amanda agreed and we chose her favorite colors, since we're celebrating her. We also had to choose a different glitter topper because she didn't have a black and white glitter topper. I'm so happy with the outcome, both of our manis came out very nice. Check out the collage she put together. Isn't it pretty?
Collage by Amanda:
Solo Shot:
So in order to achieve this look, I painted my middle nail a metal silver, and then added 2 coats of a sheer lighter silver so it wouldn't look so dark. On my index and pinky I did 3 coats of white polish, and 2 coats on my ring finger for my gradient. After dry, I used acrylic paints for my gradient as well as the dots. I added the green and blue glitter topper over my finished gradient, and then added top coat to seal off my design.
Mani is more color accurate here:

Close-Ups:
I love our manis! The color combination is just beautiful, and the glitter topper goes well with it too. I hope you guys like them as much as Amanda and I did.

Thank you Amanda for letting me do these with you. I hope you have a wonderful birthday.

Well thanks for stopping by guys, until next time.
-Ana
Polishes Used:
Top Coat: LACC "2013 Top Coat"
White: Wet N Wild "French White Creme"
Green/Blue Glitter: Sally Hansen (Complete Salon Manicure) "3, 2, 1derland"
Sheer Silver: Sinful Colors "Out of this World"
Metal Silver: Elf Nail Polish "Liquid Metal"

Sunday, March 29, 2015

Return of the Rainbow Collab

Hey guys, Happy Sunday. Today I bring you a beautiful rainbow! A rainbow mani, that is. Lol. So, Amber from nailslikelace on Instagram, hosted a nail art collaboration. The theme was rainbow. 54 people participated and Amber put this colorful collage together.
Collage by Amber:
Amber said we could do anything we wanted with the theme. We could use pastels, neons, the regular rainbow colors, etc. I decided to stick with the regular colors for my mani. I wasn't sure what to do, but I thought about recreating a mani I did last year with rainbow colors. I ended up doing something completely different because I wanted to blobbicure a second time. Apart from the blobbicure, I also wanted to incorporate a gradient. So that's what I did, check it out.
For the blobbicure, I first did a coat of white polish. Once dry, I added the second coat and added the blobs of colorful polish while the white polish was still wet. I did this, one nail at a time. I waited a while before finally adding top coat, but unfortunately, the polish still smeared. For the gradient, I first applied a coat of white polish so the colors would pop more. Then, I did the gradient with acrylic paints and topped it off with a glitter topper. Everything was sealed with a top coat. This mani was so colorful, fun and sparkly. I just loved it! Even though it smeared, it still looked pretty cool.
Rainbow Blobbicure Close-Up:
Rainbow Gradient Close-Up:
Well thanks for stopping by, I hope you enjoyed the post. Until next time.
-Ana
Polishes Used:
White: Wet N Wild (Wild Shine) "French White Creme"
Red: Daily Hues Nail Lacquer "Carol"
Orange: Sally Hansen (Complete Salon Manicure) "Hot Lava"
Yellow: NYC "Copabanana"
Green: Daily Hues Nail Lacquer "Holly"
Blue: Wet N Wild (Wild Shine) "Blue Moon"
Purple: Avon (Nailwear Pro+) "Night Violet"
Top Coat: LACC "2013 Top Coat"